Error:
SQL> startup
ORACLE instance started.
Total System Global Area 167772160 bytes
Fixed Size 1247876 bytes
Variable Size 71304572 bytes
Database Buffers 88080384 bytes
Redo Buffers 7139328 bytes
Database mounted.
ORA-00600: internal error code, arguments: [kcratr1_lastbwr], [], [], [], [],
Solution:
startup mount;
recover database;
alter system open;
Friday, September 17, 2010
Friday, May 14, 2010
Upgrade Oracle Database 10g (10.2.0.4) to 11g(11.1.0.6.0) Release 1 - Redhat Enterprise Linux 5
Pre-Installation Steps:
Stop all oracle services running on the server.
Create a new directory for storing oracle database 11g sfitware
eg: /u01/app/oracle/product/11.1.0
(Now I have 2 database product directory 1 is 10g another is 11g)
$ pwd
/u01/app/oracle/product
$ls
10.2.0 11.1.0
11g OS Package requirements
make-3.81
binutils-2.17.50.0.6
gcc-4.1.1
libaio-0.3.106
libaio-devel-0.3.106
libstdc++-4.1.1
elfutils-libelf-devel-0.125
sysstat-7.0.0
compat-libstdc++-33-3.2.3
libgcc-4.1.1
libstdc++-devel-4.1.1
unixODBC-2.2.11
unixODBC-devel-2.2.11
Verifying Kernel Parameters
kernel.sem = 250 32000 100 128
kernel.shmmax=536870912
kernel.shmmni=4096
kernel.shmall=2097152
fs.file-max=65536
net.ipv4.ip_local_port_range=1024 - 65000
net.core.rmem_default=4194304
net.core.rmem_max=4194304
net.core.wmem_default=262144
net.core.wmem_max=262144
(above mentioned parameters you can found at /etc/sysctl.conf)
a restart is required if any changes happend to kernel parameters (you can use sysctl -p , if you are not
interested to restart now, but restart is advisable)
set the ORACLE_HOME to new path
ORACLE_HOME=/u01/app/oracle/product/11.1.0;export ORACLE_HOME
change the PATH and LD_LIBRARY_PATH , becuase existing environemnt directly point to 10g
oracle home
Installation
Extract the 11g Database release 1 zip file to temporary location and run the installer using the following command
$./runInstaller


Upgrade:
set the enviroment variables to point new Oracle 11g Home
(ORACLE_HOME, ORACLE_SID,LD_LIBRARY_PATH,PATH and CLASS_PATH)
start the 11g Home database listner
(Please take the backup before starting the upgrade process)
to start the upgrade process enter the follwing command
$dbua


After the upgrade process you should set the COMPATITBLE Initialisation parameter to 11.0.0
If you are using SPFILE then use the follwing command
$sqlplus / as sysdba
SQL>ALTER SYSTEM SET COMPATIBLE = '11.0.0' SCOPE=SPFILE;
shutdown and restart the database
if you are using pfile instead of spfile then
shutdown the database and edit the initialisaion parameter file (initXXX.ora)
COMPATIBLE = 11.0.0
start the database
Stop all oracle services running on the server.
Create a new directory for storing oracle database 11g sfitware
eg: /u01/app/oracle/product/11.1.0
(Now I have 2 database product directory 1 is 10g another is 11g)
$ pwd
/u01/app/oracle/product
$ls
10.2.0 11.1.0
11g OS Package requirements
make-3.81
binutils-2.17.50.0.6
gcc-4.1.1
libaio-0.3.106
libaio-devel-0.3.106
libstdc++-4.1.1
elfutils-libelf-devel-0.125
sysstat-7.0.0
compat-libstdc++-33-3.2.3
libgcc-4.1.1
libstdc++-devel-4.1.1
unixODBC-2.2.11
unixODBC-devel-2.2.11
Verifying Kernel Parameters
kernel.sem = 250 32000 100 128
kernel.shmmax=536870912
kernel.shmmni=4096
kernel.shmall=2097152
fs.file-max=65536
net.ipv4.ip_local_port_range=1024 - 65000
net.core.rmem_default=4194304
net.core.rmem_max=4194304
net.core.wmem_default=262144
net.core.wmem_max=262144
(above mentioned parameters you can found at /etc/sysctl.conf)
a restart is required if any changes happend to kernel parameters (you can use sysctl -p , if you are not
interested to restart now, but restart is advisable)
set the ORACLE_HOME to new path
ORACLE_HOME=/u01/app/oracle/product/11.1.0;export ORACLE_HOME
change the PATH and LD_LIBRARY_PATH , becuase existing environemnt directly point to 10g
oracle home
Installation
Extract the 11g Database release 1 zip file to temporary location and run the installer using the following command
$./runInstaller

Select the product you want to install (default oracle 11g)

Select the installation method advanced Installation

Select the Enterprise Option

Install location

Prerequisite Checks

Update existing database to "No"

Install Software only

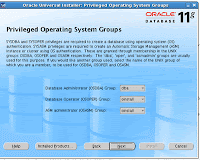
OS privileged groups

Installtion Summary

Progress Screen

Finish the instllation
Upgrade:
set the enviroment variables to point new Oracle 11g Home
(ORACLE_HOME, ORACLE_SID,LD_LIBRARY_PATH,PATH and CLASS_PATH)
start the 11g Home database listner
(Please take the backup before starting the upgrade process)
to start the upgrade process enter the follwing command
$dbua

Introduction Screen

Review or select the database for upgrade

Dump Location (like udump, cdump and bdump locations)

Keep the default selection

Flsh recovery locations

Uncheck the invlid object compilation during upgrade (you can do this after finish the installation)

If you didn't taken backup, then this is the last chance to take the bakup

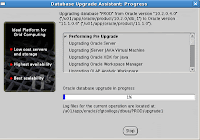
Upgrade progress

You can safely ignore this message (This issue is tracked with Oracle bug 6322672.)

You can safely ignore this message (These errors do not result in any data loss. Therefore, you can ignore these errors. This issue is tracked with Oracle bug 6705429.)

Finish the upgrade now.
Now we will compile all invalid objects in the database using the follwing command:
$sqlplus / as sysdba
SQL>@$ORACLE_HOME/rdbms/admin/utlrp
After the upgrade process you should set the COMPATITBLE Initialisation parameter to 11.0.0
If you are using SPFILE then use the follwing command
$sqlplus / as sysdba
SQL>ALTER SYSTEM SET COMPATIBLE = '11.0.0' SCOPE=SPFILE;
shutdown and restart the database
if you are using pfile instead of spfile then
shutdown the database and edit the initialisaion parameter file (initXXX.ora)
COMPATIBLE = 11.0.0
start the database
Wednesday, May 12, 2010
Personalize Oracle Apps 11i (E-business Suite)
Messages:
Application Developer -> Application -> Messages
FND_SSO_COPYRIGHT_TEXT - Copyright message (Default Copyright (c) 2006, Oracle. All rights reserved.)
FND_SSO_EBIZ_SUITE - Application Name (Default E-Business Suite)
FND_EBIZ_SUITE - Company and Application Name (Default Oracle E-Business Suite)
FND_SSO_SARBANES_OXLEY_TEXT - Corporate Policy Message
Functions:
Application Developer -> Application -> Functions
If you want to change the default branding "E-business Suite" in other pages
Change the user function name of "FWK_HOMEPAGE_BRAND" (OA Framework E-Business Homepage Branding) to your own application name
Profile:
System Administrator -> Profile -> System
The oracle logo is displayed lot of places in oracle EBS . If you want to remove this logo globally simply chnage the profile value of "Corporate Branding Image for Oracle Applications" (FND_CORPORATE_BRANDING_IMAGE) to your company logo( copy the gif file to $OA_MEDIA and set the profile value to /OA_MEDIA/xxx.gif)
How to enable Personalization option for OAFramework Pages
System Administrator -> Profile -> System
Following profile values set to yes at user level
1. Personalize Self-Service Defn (FND_CUSTOM_OA_DEFINTION) - Yes
2. FND: Personalization Region Link Enabled (FND_PERSONALIZATION_REGION_LINK_ENABLED) - Yes
Change Oracle Standard Logo on Oracle APPS Forms Application
 How to change the oracle logo on right hand side (Oracle 11i )
Below files can be overwrittten by oracle patch or autoconfig , so you need to back the files before doing any patches on application tier side ,
(<>_<>.cfg means autoconfig enabled on apps server)
1. Go to $OA_HTML/bin/appsweb.cfg or appsweb_<>_<>.cfg
2. Check the values of baseHTML and baseHTMLJInitiator (%OA_HTML%/US/appsbase.htm)
3. open $OA_HTML/US/appsbase.htm
search Forms Applet Parameters
and add IEhtml += '<' + 'PARAM name=logo value="' + xlogo + '">';
you can add above line just below the else and above the serverPort parameter
else {
// Forms Applet Parameters
IEhtml += '<' + 'PARAM name=logo value="' + xlogo + '">';
IEhtml += '<' + 'PARAM name=serverPort value="' + xsport + '">';
Search Oracle Applications default Parameters
add var xlogo = "%logo%"
You can add this under // Additional Forms Parameter Names and Values, I have added this under xvp4
var xvp4 = "%vparam4%"
var xlogo = "%logo%"
4. Add new applet parameter called "logo" under $OA_HTML/bin/appsweb.cfg or appsweb_<>_<>.cfg
Search for UI parameters: DO NOT MODIFY unless so instructed by Oracle
add logo=oracle/apps/media/xxx.gif
5. Save the files
6. Copy the logo gif file to $OA_MEDIA and $OA_JAVA
Logout and close the browser and open a new browser section and test the forms. (Normally service restart not required ).
Application Developer -> Application -> Messages
FND_SSO_COPYRIGHT_TEXT - Copyright message (Default Copyright (c) 2006, Oracle. All rights reserved.)
FND_SSO_EBIZ_SUITE - Application Name (Default E-Business Suite)
FND_EBIZ_SUITE - Company and Application Name (Default Oracle E-Business Suite)
FND_SSO_SARBANES_OXLEY_TEXT - Corporate Policy Message
Functions:
Application Developer -> Application -> Functions
If you want to change the default branding "E-business Suite" in other pages
Change the user function name of "FWK_HOMEPAGE_BRAND" (OA Framework E-Business Homepage Branding) to your own application name
Profile:
System Administrator -> Profile -> System
The oracle logo is displayed lot of places in oracle EBS . If you want to remove this logo globally simply chnage the profile value of "Corporate Branding Image for Oracle Applications" (FND_CORPORATE_BRANDING_IMAGE) to your company logo( copy the gif file to $OA_MEDIA and set the profile value to /OA_MEDIA/xxx.gif)
How to enable Personalization option for OAFramework Pages
System Administrator -> Profile -> System
Following profile values set to yes at user level
1. Personalize Self-Service Defn (FND_CUSTOM_OA_DEFINTION) - Yes
2. FND: Personalization Region Link Enabled (FND_PERSONALIZATION_REGION_LINK_ENABLED) - Yes
Change Oracle Standard Logo on Oracle APPS Forms Application
Below files can be overwrittten by oracle patch or autoconfig , so you need to back the files before doing any patches on application tier side ,
(<
1. Go to $OA_HTML/bin/appsweb.cfg or appsweb_<
2. Check the values of baseHTML and baseHTMLJInitiator (%OA_HTML%/US/appsbase.htm)
3. open $OA_HTML/US/appsbase.htm
search Forms Applet Parameters
and add IEhtml += '<' + 'PARAM name=logo value="' + xlogo + '">';
you can add above line just below the else and above the serverPort parameter
else {
// Forms Applet Parameters
IEhtml += '<' + 'PARAM name=logo value="' + xlogo + '">';
IEhtml += '<' + 'PARAM name=serverPort value="' + xsport + '">';
Search Oracle Applications default Parameters
add var xlogo = "%logo%"
You can add this under // Additional Forms Parameter Names and Values, I have added this under xvp4
var xvp4 = "%vparam4%"
var xlogo = "%logo%"
4. Add new applet parameter called "logo" under $OA_HTML/bin/appsweb.cfg or appsweb_<
Search for UI parameters: DO NOT MODIFY unless so instructed by Oracle
add logo=oracle/apps/media/xxx.gif
5. Save the files
6. Copy the logo gif file to $OA_MEDIA and $OA_JAVA
Logout and close the browser and open a new browser section and test the forms. (Normally service restart not required ).
Friday, May 7, 2010
Oracle Database 11g New Feature (Virtual Column): Create a table with virtual Column
Create a table with virtual Column
create table marks (regno varchar2(10),
m1 number,
m2 number,
m3 number,
total number
generated always as
(nvl(m1,0) + nvl(m2,0) + nvl(m3,0))
virtual,
grade varchar2(30)
generated always as
(case When (nvl(m1,0) + nvl(m2,0) + nvl(m3,0)) > 290 Then 'A Grade'
When (nvl(m1,0) + nvl(m2,0) + nvl(m3,0)) >280 And (nvl(m1,0) + nvl(m2,0) + nvl(m3,0)) <= 290 Then 'B Grade'
Else 'C Grade'
end
) virtual
)
the column is specified as "generated always as", meaning the column values are generated at runtime, not stored as part of the table. the end of the column with "virtual"
insert into marks (regno,m1,m2,m3) values(101,90,89,88);
insert into marks (regno,m1,m2,m3) values(102,95,94,95);
SQL> select * from marks;
REGNO M1 M2 M3 TOTAL GRADE
---------- ---------- ---------- ---------- ---------- -------
101 90 89 88 267 C Grade
102 95 94 95 284 B Grade
Apply Oracle Database release 10.2.0.4 patch (6810189_10204) on Oracle Database 10g Release 2 (10.2.0.3) Installation On Red Hat Enterprise Linux 5 (RHEL5)
Preinstallaltion Task
Shutdown the database instance cleanly
Stop the database listner
Stop the EM (emctl stop dbconsole)
Set up environment variables ORACLE_HOME & ORACLE_SID
Backup the system
Installation
Extract the path into a temprory directory
Run the installer from the patch directory
$./runInstaller


After finish the installation click finish button.
Post Installation
If you are interest to conitnue manual (non-iteractive process)process you can follow the same procedure on patch 1 post installation
Otherwise you can use dbua.
start the listner using the foloowing command
$lsnrctl start
$dbua
follow the instruction on the screen and start the database upgrade process. Uncheck the invalid objects compilation while upgrade. This will slowdown the upgrade process.


Shutdown the database instance cleanly
Stop the database listner
Stop the EM (emctl stop dbconsole)
Set up environment variables ORACLE_HOME & ORACLE_SID
Backup the system
Installation
Extract the path into a temprory directory
Run the installer from the patch directory
$./runInstaller

Welcome screen

Oracle Home Details

Prerequisite Check

Oracle Configuration Manager

Installtion Summary Screen
After finish the installation click finish button.
Post Installation
If you are interest to conitnue manual (non-iteractive process)process you can follow the same procedure on patch 1 post installation
Otherwise you can use dbua.
start the listner using the foloowing command
$lsnrctl start
$dbua
follow the instruction on the screen and start the database upgrade process. Uncheck the invalid objects compilation while upgrade. This will slowdown the upgrade process.

Dbua introduction screen

Select the instance for upgrade

I have selected the default option

To improve the performance of upgrade , please uncheck the invalid objects compilation. I have done this after the database upgrage.

Backup database , if you didn't taken earlier

Flash_recovery area setup

Summary

Progress Screen

100% Complete

Upgrade results.
after finish upgrade use the following command to compile invalid objects in the database:
$sqlplus / as sysdba
Friday, April 30, 2010
Apply Oracle Database release 10.2.0.3 patch (5337014_10203) on Oracle Database 10g Release 2 (10.2.0.2) Installation On Red Hat Enterprise Linux 5 (RHEL5)
Preinstallaltion Task
Installation
Extract the path into a temprory directory
Run the installer from the patch directory
$./runInstaller


- Shutdown the database instance cleanly
- Stop the database listner
- Stop the EM (emctl stop dbconsole)
- Set up environment variables ORACLE_HOME & ORACLE_SID
- Backup the system

Welcome Screen

Oracle Home Details

Installation Summary
After finish the installation click finish button.
Post Installation
If you are interest to conitnue manual (non-iteractive process)process you can follow the same procedure on patch 1 post installation
Otherwise you can use dbua.
start the listner using the foloowing command
$lsnrctl start
$dbua
follow the instruction on the screen and start the database upgrade process. Uncheck the invalid objects compilation while upgrade. This will slowdown the upgrade process.

Upgrade process progress screen shot
After finish the upgrade process use the following command to compile the invalid objects
$sqlplus / as sysdba
Saturday, April 24, 2010
Apply Oracle Database release 10.2.0.2 patch (4547817_10202) on Oracle Database 10g Release 2 (10.2.0.1) Installation On Red Hat Enterprise Linux 5 (RHEL5)
Preinstallaltion Task


SQL>shutdown
$lsnrctl stop
You will need to install Natively Compiled Java Libraries (NCOMP) from oracle database companion CD. This will install the basic version. So we need to apply the latest patch against the newly installed componenets.
Run the patch installer again and re-install Oracle Java client 10.2.0.1.
Run the database script again.
SQL>startup upgrade
SQL>spool patch.log
SQL>@$ORACLE_HOME/rdbms/admin/catupdgrd.sql
SQL>spool off
SQL>shutdown
SQL> startup
run the utlrp script to re-compile invalid databse opjects
SQL>@$ORACLE_HOME/rdbms/admin/utlrp.sql
- Shutdown the database instance cleanly
- Stop the database listner
- Stop the EM (emctl stop dbconsole)
- Set up environment variables ORACLE_HOME & ORACLE_SID
- Backup the system
- Extract the path into a temprory directory
- Run the installer from the patch directory

Welcome Screen

Oracle Home Details

Summary Screen

Progree Screen

Finish the patch software installation
Post Instllation
Sufficient space must be allocated for SYSTEM and SYSAUX tablespaces
Set the parameters values of SHARED_POOL_SIZE and JAVA_POOL_SIZE
If necessary set the values of these parameters to at lease 150MB
How to view and set the values of these parameters
$sqlplus / as sysdba
SQL>startup nomount
SQL>show parameter shared_pool_size
SQL>show parameter java_pool_size
SQL>alter system set shared_pool_size='150M' scope=spfile;
SQL>alter system set java_pool_size='150M' scope=spfile;
SQL>shutdown
Upgrade the database
Start the listener
lsnrctl start
Start the database for upgrade
SQL>sqlplus / as sysdba
SQL>startup upgrade
SQL>spool patch.log
SQL>@$ORACLE_HOME/rdbms/admin/catupdgrd.sql
SQL>spool off
Verify the patch.log file for errors
Following error encountered in the patch.log file
select dbms_java.full_ncomp_enabled from dual
*
ERROR at line 1:
ORA-29558: JAccelerator (NCOMP) not installed. Refer to Install Guide for
instructions.
ORA-06512: at "SYS.DBMS_JAVA", line 236
Above error can be ignored, or you can use the follwing solution
SQL>shutdown
$lsnrctl stop
You will need to install Natively Compiled Java Libraries (NCOMP) from oracle database companion CD. This will install the basic version. So we need to apply the latest patch against the newly installed componenets.
Run the patch installer again and re-install Oracle Java client 10.2.0.1.
Run the database script again.
SQL>startup upgrade
SQL>spool patch.log
SQL>@$ORACLE_HOME/rdbms/admin/catupdgrd.sql
SQL>spool off
SQL>shutdown
SQL> startup
run the utlrp script to re-compile invalid databse opjects
SQL>@$ORACLE_HOME/rdbms/admin/utlrp.sql
Saturday, April 17, 2010
Oracle Database 10g Release 2 (10.2.0.1) Installation On Red Hat Enterprise Linux 5 (RHEL5)
This paper will guide through the installation of oracle database on Red hat Enterprise Linux 5.0. This linux is installed on VMware.
Steps:
1. Install vmware
2. Install Linux
3. Confgiure RHL for oracle installation
4. Install oracle software
1. Install VMWARE
Earliesr posts are available for reference
2. Install Linux
Earlier posts are avaiable for reference
3. Confgiure RHL for installation
Verify Linux Kernel Installation
#uname -r
2.6.18-128.el5
Packages required for the oracle database installation
Java Requirment
JDK already bundled with oracle software
Software Requirements
ar
gcc
g++
ld
ksh
make
X Display Server
eg: which ar, which gcc, xclock
Verify the System Requirements
To the RAM and SWAP space avaiable in the system using the follwing commands
#grep MemTotal /proc/meminfo
#grep SwapTotal /proc/meminfo
Minimum requirements of RAM is 1024 MB
Minimum requirements of SWAP is 1024 MB
/tmp directory needs at least 400MB of free space
To checkthe free space on the system
#df -h
Create Oracle Software Groups and Users
user and group used to maintain oracle software in OS
once user and two groups should be created
user - oracle
groups - oinstall and dba
#/usr/sbin/groupadd oinstall
#/usr/sbin/groupadd dba
#/usr/sbin/useradd -m -g oinstall -G dba oracle
#id oracle
uid=500(oracle) gid=501(oinstall) groups=501(oinstall),502(dba)
#passwd oracle
Changing password for user oracle.
New UNIX password:
Retrype new UNIX password:
passwd: all authentication tokens updated successfully.
Create Directories for Oracle Software Installtion
Create directories in sperate file system instead of root file system
#df -h
#df -h
Filesystem Size Used Avail Use% Mounted on
/dev/mapper/VolGroup00-LogVol00
18G 3.3G 14G 21% /
/dev/sda1 145M 12M 126M 9% /boot
/dev/sdb1 20G 173M 19G 1% /u01
/dev/sdc1 20G 173M 19G 1% /u02
#mkdir -p /u01/app/oracle
#chown -R oracle:oinstall /u01/app/oracle
#chmod -R 775 /u01/app/oracle
Configure Kernel Parameters
Don't chnage the kernel parameters, if your system is using higher thatn the below mentioned values:
kernel.shmall = 2097152
kernel.shmmax = 536870912
kernel.shmmni = 4096
kernel.sem = 250 32000 100 128
fs.file-max = 65536
net.ipv4.ip_local_port_range = 1024 65000
net.core.rmem_default=262144
net.core.wmem_default=262144
net.core.rmem_max=262144
net.core.wmem_max=262144
Verify kernel parameters
# /sbin/sysctl -a grep shm
vm.hugetlb_shm_group = 0
kernel.shmmni = 4096
kernel.shmall = 268435456
kernel.shmmax = 4294967295
# /sbin/sysctl -a grep sem
kernel.sem = 250 32000 100 128
# /sbin/sysctl -a grep file-max
fs.file-max = 102279
# /sbin/sysctl -a grep ip_local_port_range
net.ipv4.ip_local_port_range = 1024 65000
# /sbin/sysctl -a grep rmem_default
net.core.rmem_default = 262144
# /sbin/sysctl -a grep rmem_max
net.core.rmem_max = 262144
# /sbin/sysctl -a grep rmem_max
net.core.rmem_max = 262144
# /sbin/sysctl -a grep rmem_max
net.core.rmem_max = 262144
Verifying host configuration
1./etc/hosts
1.127.0.0.1.
eg: 127.0.0.1 RHLdbprimary.localdomain RHLdbprimary localhost.localdomain localhost
192.168.1.100 RHLdbprimary.localdomain RHLdbprimary
2./etc/sysconfig/network: formtat as follows HOSTNAME=.
3./etc/sysconfig/networking/profiles/default: remove network file if exists
You must restart the system after the changes.
Setting Limits for Oracle User
Add the following lines to the /etc/security/limits.conf:
#cat >> /etc/security/limits.conf << EOF
oracle soft nproc 2047
oracle hard nproc 16384
oracle soft nofile 1024
oracle hard nofile 65536
EOF
#cat >> /etc/pam.d/login << EOF
session required /lib/security/pam_limits.so
EOF
Login as the oracle user and add the following lines to .bash_profile:
ORACLE_BASE=/u01/app/oracle;export ORACLE_BASE
ORACLE_HOME=$ORACLE_BASE/product/10.2.0/db_1; export ORACLE_HOME
PATH=$ORACLE_HOME/bin:/usr/sbin:$PATH; export PATH
LD_LIBRARY_PATH=$ORACLE_HOME/lib:/lib:/usr/lib; export LD_LIBRARY_PATH
CLASS_PATH=$ORACLE_HOME/JRE:$ORACLE_HOME/jlib:$ORACLE_HOME/rdbms/jlib; export CLASS_PATH
TMP=; export TMP
TMPDIR=;export TMPDIR
if [ $USER = "oracle" ]; then
if [ $SHELL = "/bin/ksh" ]; then
ulimit -p 16384
ulimit -n 65536
else
ulimit -u 16384 -n 65536
fi
fi
4. Install Oracle Software
Start the Oracle Universal Installer (OUI) by the follwing command:
./runInstaller


Steps:
1. Install vmware
2. Install Linux
3. Confgiure RHL for oracle installation
4. Install oracle software
1. Install VMWARE
Earliesr posts are available for reference
2. Install Linux
Earlier posts are avaiable for reference
3. Confgiure RHL for installation
Verify Linux Kernel Installation
#uname -r
2.6.18-128.el5
Packages required for the oracle database installation
- binutils-2.17.50.0.6-9.el5
- compat-db-4.2.52-5.1
- control-center-2.16.0-16.el5
- compat-gcc-34-3*
- compat-gcc-34-c++-3*
- gcc-4*
- libXp-1*
- gcc-c++-4.1.2-44.el5
- glibc-2.5-34
- glibc-common-2.5-34
- libgnome-2.16.0-6.el5
- libgnomeui-2.16.0-5.el5
- libstdc++-4.1.2-44.el5.i386
- libstdc++-devel-4.1.2-44.el5.i386
- make-3.81-3.el5
- sysstat-7.0.2-3.el5.i386
- libaio-0.3.106-3.2
- openmotif21-2.1.30-11.RHEL4.6.i386
- compat-libstdc++-296-2.96-138.i386
- libgcc-4.1.2-44.el5
- setarch-2.0-1.1
- compat-db-4.2.52-5.1
- libaio-devel-0.3.106-3.2.i386
- compat-binutils215-2.15.92.0.2-24.i386
- compat-libcwait-2.1-1.i386
- compat-libstdc++-egcs-1.1.2-1.i386
- compat-oracle-el5-1.0-5.i386
- xorg-x11-libs-compat-6.8.2-1.EL.33.0.1.i386
Java Requirment
JDK already bundled with oracle software
Software Requirements
ar
gcc
g++
ld
ksh
make
X Display Server
eg: which ar, which gcc, xclock
Verify the System Requirements
To the RAM and SWAP space avaiable in the system using the follwing commands
#grep MemTotal /proc/meminfo
#grep SwapTotal /proc/meminfo
Minimum requirements of RAM is 1024 MB
Minimum requirements of SWAP is 1024 MB
/tmp directory needs at least 400MB of free space
To checkthe free space on the system
#df -h
Create Oracle Software Groups and Users
user and group used to maintain oracle software in OS
once user and two groups should be created
user - oracle
groups - oinstall and dba
#/usr/sbin/groupadd oinstall
#/usr/sbin/groupadd dba
#/usr/sbin/useradd -m -g oinstall -G dba oracle
#id oracle
uid=500(oracle) gid=501(oinstall) groups=501(oinstall),502(dba)
#passwd oracle
Changing password for user oracle.
New UNIX password:
Retrype new UNIX password:
passwd: all authentication tokens updated successfully.
Create Directories for Oracle Software Installtion
Create directories in sperate file system instead of root file system
#df -h
#df -h
Filesystem Size Used Avail Use% Mounted on
/dev/mapper/VolGroup00-LogVol00
18G 3.3G 14G 21% /
/dev/sda1 145M 12M 126M 9% /boot
/dev/sdb1 20G 173M 19G 1% /u01
/dev/sdc1 20G 173M 19G 1% /u02
#mkdir -p /u01/app/oracle
#chown -R oracle:oinstall /u01/app/oracle
#chmod -R 775 /u01/app/oracle
Configure Kernel Parameters
Don't chnage the kernel parameters, if your system is using higher thatn the below mentioned values:
kernel.shmall = 2097152
kernel.shmmax = 536870912
kernel.shmmni = 4096
kernel.sem = 250 32000 100 128
fs.file-max = 65536
net.ipv4.ip_local_port_range = 1024 65000
net.core.rmem_default=262144
net.core.wmem_default=262144
net.core.rmem_max=262144
net.core.wmem_max=262144
Verify kernel parameters
# /sbin/sysctl -a grep shm
vm.hugetlb_shm_group = 0
kernel.shmmni = 4096
kernel.shmall = 268435456
kernel.shmmax = 4294967295
# /sbin/sysctl -a grep sem
kernel.sem = 250 32000 100 128
# /sbin/sysctl -a grep file-max
fs.file-max = 102279
# /sbin/sysctl -a grep ip_local_port_range
net.ipv4.ip_local_port_range = 1024 65000
# /sbin/sysctl -a grep rmem_default
net.core.rmem_default = 262144
# /sbin/sysctl -a grep rmem_max
net.core.rmem_max = 262144
# /sbin/sysctl -a grep rmem_max
net.core.rmem_max = 262144
# /sbin/sysctl -a grep rmem_max
net.core.rmem_max = 262144
Verifying host configuration
1./etc/hosts
1.127.0.0.1
eg: 127.0.0.1 RHLdbprimary.localdomain RHLdbprimary localhost.localdomain localhost
192.168.1.100 RHLdbprimary.localdomain RHLdbprimary
2./etc/sysconfig/network: formtat as follows HOSTNAME=
3./etc/sysconfig/networking/profiles/default: remove network file if exists
You must restart the system after the changes.
Setting Limits for Oracle User
Add the following lines to the /etc/security/limits.conf:
#cat >> /etc/security/limits.conf << EOF
oracle soft nproc 2047
oracle hard nproc 16384
oracle soft nofile 1024
oracle hard nofile 65536
EOF
#cat >> /etc/pam.d/login << EOF
session required /lib/security/pam_limits.so
EOF
Login as the oracle user and add the following lines to .bash_profile:
ORACLE_BASE=/u01/app/oracle;export ORACLE_BASE
ORACLE_HOME=$ORACLE_BASE/product/10.2.0/db_1; export ORACLE_HOME
PATH=$ORACLE_HOME/bin:/usr/sbin:$PATH; export PATH
LD_LIBRARY_PATH=$ORACLE_HOME/lib:/lib:/usr/lib; export LD_LIBRARY_PATH
CLASS_PATH=$ORACLE_HOME/JRE:$ORACLE_HOME/jlib:$ORACLE_HOME/rdbms/jlib; export CLASS_PATH
TMP=
TMPDIR=
if [ $USER = "oracle" ]; then
if [ $SHELL = "/bin/ksh" ]; then
ulimit -p 16384
ulimit -n 65536
else
ulimit -u 16384 -n 65536
fi
fi
4. Install Oracle Software
Start the Oracle Universal Installer (OUI) by the follwing command:
./runInstaller


Subscribe to:
Posts (Atom)